Wednesday, April 4, 2012

We are officially in full-swing with the den now.  Whoever thought wood paneling was a good idea was a total weirdo.  Do people still like this stuff? It feels SO GOOD to paint over it!! Every roll of OBP I do over the stuff I silently say "take that!" in my head.  Brent spent most of the day yesterday getting the seams and molding primed with a brush and I went back today to finish rolling the primer on.  We splurged and bought odorless oil-based primer for this project ($5 more than the original Kilz) and it was definitely worth it! Here are some photos!!
All the cracks are primed and all the nail holes filled in and sanded!


Done priming!

 We are going to go back and prime the trim and the big window in the room- we thought it might be nice to take this one step at a time! It already looks better!! Now, about that BRASS (again, who liked this...) fireplace surround! The insert itself is so super nice-- really heavy and very expensive to replace.  It has glass doors and screens, and I really would hate to have to buy a new, better-looking one.  So of course, I decided to try to fix it! I started by taking off the glass doors (with my head in the fireplace getting covered in soot) and lightly sanding the brass so it wasn't so shiny.  I went to Home Depot and got some cover paper and High Heat spray paint.
In matte black

I covered up the brick as best I could, but quickly realized I couldn't get the sides of the insert sprayed well enough with paper on.  We are going to prime and paint the fireplace white anyway, so I thought it would be ok to just spray the brick on the sides.  The hardest part of this project was putting paper in the fireplace hole.  I'm not sure if we'll ever actually use it, because I think I will be forever scared of spontaneous combustion!! Here it is after 3 coats:


 It's hard to see it well since I haven't removed the paper yet and it's all over the brick, but talk about an instant transformation! It looks brand new.  Little did I know there is apparently "spray paint dust" that comes along with spray painting inside.  I looked down at my feet and this is what they looked like...

...so I tried to clean up the best I could! Also, since I was inside, you can imagine that this is what I looked like all day:
Gotta love (hate) those spray paint fumes!

But this was my beautiful spring view for the day, which helped:

One last update.  I got the handles that I ordered from Target.com for the laundry room.. What do you think??

We are heading to the beach tomorrow night for a little R and R for the long weekend, which I think we will both appreciate! Can't wait to come back rested, ready to tackle the den some more! Have a happy Easter everyone!!
Sunday, April 1, 2012

Prep-Work!

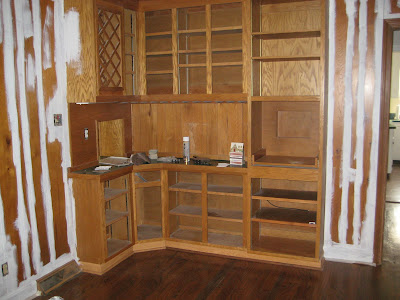
So it's been a little while since I posted, mainly because we are getting a few new projects started and the prep-work is what takes the longest (and is the least fun!). We have started to tackle the super ugly fake wood paneling in the den.  What a project this is going to be! We have to paint all the trim and doors, built-ins and the windows along with the walls, so it will be a while before I can post a before and after photo of this room, but I know it is going to be a HUGE difference. Here are some in-progress pics!
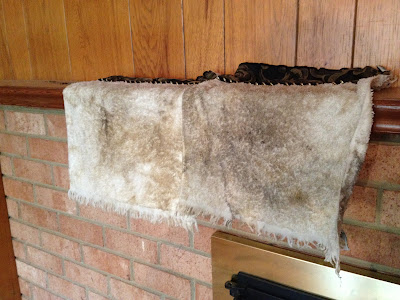
Post sanding all the trim-- this is why you wipe down the walls! (both these towels were white)

Putting wood filler in all the holes.

Even just this little bit of white makes me excited!

The drywall guys have finished their work on all the walls we removed the wallpaper from.  They patched and sanded all of that in two afternoons, where it would have taken us a week, all for under $200.  Definitely feels like money well spent.. We'll see how the walls look when they're painted tho- hopefully not too lumpy!

The laundry room still isn't done (I special ordered some cabinet handles from Target and they still haven't shipped!) but I'm just so excited about the difference, I want to show some before and almost-after photos. 
Before. It really is hard to see how nasty this room was!

Our $5 reject paint from Lowe's!

New paint on all the built-ins

Beautiful new washer and dryer! (we went ahead and bought these cause I got them for a GREAT deal!)
Be sure to come back for complete after pictures-- I am so excited about this room (maybe because it's small and I feel like I can actually complete it!).

Monday, March 26, 2012

Mommy Daughter Day

This weekend I learned something I never thought I would learn-- How to knit! It was a two hour intro class that could have/should have been all day! Who knew knitting was so dang hard.  It was such a fun experience and I really enjoyed getting to spend some fun time with Mom (one of the things I love about living in NC again).  Here is what we accomplished in two hours.. kind of pitiful looking but we were so proud! I'm going to be looking for a frame very soon for my creation! ;)

We got a Gigi's cupcake afterwards which was delicious (!!) then headed to Ikea since I hadn't experienced it before (I know, I think I'm the only person in America who has never been to Ikea).  It was ca-razy! I can't wait to go back when I have some more time to look around.  Definitely a place to get to know well with a new house. 
Another highlight of my weekend- The Hunger Games.  I don't know if you have read these books, but you must if you haven't.  I am not a reader at all but I read all three of them in about a month.  I have never loved a book so much in my life, and the movie did not dissappoint!

Sunday, March 25, 2012

Busy Day

Today was a very busy day!  We went to the house this morning with the intention of cleaning out the dryer vent, in preparation for the washer/dryer delivery on Wednesday.  We knew the vent was really dirty, but we had no idea it was going to be this dirty! We stuck the end of the brush into the vent and it went about 3 inches before it got stuck.. so much for that easy idea.  Like almost all of our other projects, it was time for plan B.  We went down in the crawl space and realized the vent was about 15' long and went all the way from the laundry room floor, thru the crawl space, to the outside, in one long continuous line.  The new plan was to remove the whole line, clean it, then put it back in place.  Well, after trying once to put the brush through with the duct straight, we quickly realized this thing was never going to be clean.. ever.  It was SO FULL of dryer lint, it was HARD.  I mean, come on people! Take care of your house! We are so lucky we didn't just move in, hook up our dryer, and BAM- house fire!  As you may have guessed, we had to go to Home Depot and buy an all new vent line and just start over.  Here are some pictures of the ridiculousness. 
Peeping down from the laundry room

G-R-O-S-S

This is literally a third of it.  Whole pencils came out of this thing!


On a positive note, the kitchen floors are done!! These floors looked awful when we bought the house.  They look really good now, and it's amazing to look back at the before pictures! This was also an adventure, as we experienced a moderate flood in the kitchen, but all is well now :)  See for yourself!
Before
Before
Progress!

So much better! :)
Looks like a brand new floor!

That's all for today, but that is not all we did today! Stay tuned for before and after pictures of our laundry room! Teaser: we got $5 reject paint from Lowe's and completely transformed it!

Wednesday, March 21, 2012

It's Potty Time

Ok.. now this was a project that I knew would be easy.. I knew I could go over to the house on my day off and get this pesky project done on my own- no problem.  Well, just like any project, it ended up being way harder than I thought.  Things tend to be a tad bit more complicated when you're dealing with a house that's almost 50 years old.  All I wanted to accomplish was putting on a new toilet seat today.  The existing one was a little rough around the edges (literally- it poked you when you sat down) and was really corroded on the metal hinges.  When I got on the floor to look underneath, things got weird.  The plastic parts that keep the seat bolts in place were a little more like wax and a lot less like plastic.  They were also recessed into the toilet-- very hard to access! I got my hard core pliers and began to turn.. the whole thing kind of melted into a ball of plastic.  I managed to somehow get the right one off, but the left was NOT going to come.  So, I hopped in the car and it was off to Home Depot where I bought a cute little hacksaw to hopefully cut off the plastic part.  When I got home, it of course wouldn't fit into the recessed part enough for me to reach it.  At this point, I had admitted defeat and was going to call it a day, but then I just got mad- Really? A toilet seat?! So I got down to business and just starting sawing away on the metal hinge.  Lo and behold-- I got through and it was off! Wooohooo! Installation was easy peasy and I am SO GLAD this project is done! And it looks so much better too- a lot cheaper than a new toilet!
Yeah, what's up? Sawed right through
 

Old, dingy seat..

Voila! So pretty!

Saturday, March 17, 2012

World's Biggest Sharpie Marker?!

Today was my first experience with oil-based primer and OMG it was intense.  I had read all over the internet how awful the smell was.  I think I was expecting a strong paint smell, but it was like the room was covered in big fat sharpies.  Now, Brent and I have had a lot of discussions about how my sense of smell seems to be incredibly keen, so you can imagine how I was handling the smell of this.  Luckily, since I was expecting the odor, I bought a hard-core respirator at Home Depot which I HIGHLY recommend! I put that puppy on and I could not smell a thing... not one whiff.  It made my voice really muffled, but I'm pretty sure Brent did not mind that. 

 So, back to our progress.  We started today with more sponging.  The walls still had a lot of wallpaper paste on them, so we finished sponging off the glue, then sanded all the walls.  There were a lot of drywall rips, so we had to try to get them as smooth as we could.  The drywall guy came to look at our damage the other day, and he went on and on about how good of a job we did taking down the wallpaper (I'd hate to see a bad job, sheesh!).  He asked us to sand and prime with OBP and he could come back and slap a quick skim coat on and viola-- we'll be done! (and ready to prime and paint...)  I think I am just sick of looking at these walls.  It's hard to concentrate on one project for a couple weeks, but I'm glad we've entered a new phase of the project and we can finally leave the house with the walls looking better than when we got there! We're going to finish the primer tomorrow, then it's onto having the kitchen floor refinished and the drywall repaired. Things are looking up!
Sanding all the drywall patches-- not so fun.

Loved this respirator-- a must for OBP!

Amazing difference! (see previous post for before pics!)

Looking good!


Sunday, March 11, 2012

Hol[e]y Wallpaper!

Brent and I closed on our house Wednesday March 7! We closed in the morning and then we went straight to the house to start on the wallpaper. Dum dum dum.... It was the most exhausting process.  We bought all the right things (thanks to extensive blog stalking) and were super motivated to get going.  IT. WAS. AWFUL.  The paper liner had been applied directly onto the unfinished drywall.  It was one layer of paper, 3 layers of old wallpaper backing, then the paper liner.  I had read it's really hard not to have the drywall paper rip when you're removing old paper, but every time I had a new piece rip off, my heart would sink! It took us about 20 hours, but it will hopefully be oh-so worth it! We have to get the drywall guys out soon to patch the damage, and I think I will be able to picture the finished product a little better once they come.  I think this whole process was an emotional roller coaster! I started out excited, was super motivated, then tired and wanted to cry!


Here was our process, section by section: 
1. Score the outer paper layer. Roll on the paper remover.  Let sit for a few minutes, peel it off.
2. Score the under paper layer.  Roll on the paper remover.  Let sit for a few minutes, peel it off.
3. Score the last paper layer on top of the liner.  Roll on the paper remover.  Let sit for a few minutes, peel it off as best as possible, with as little damage as possible.  Repeat for the rest of the paper!


There was a bit of a learning curve with this, but it was the same process for the whole project.  The happiest part of it was getting into the entry and having some sections that had been put over paint! It was like a gift from God! Haha! I'm really anxious to get the drywall guys out to get an estimate on the work that needs to be done-- I realllly hope it's just a repair process that won't be too pricey. 

Before Starting-- it's hard to realize how much there is!
One wall down.

Saved the best for day 2-- the 2 story wall.

The entry that had paint under the paper-- so much easier!

Done!

Done! I still don't know why there were about 4 different types of drywall??

No more paper-- thank goodness!

The PiViT ladder tool-- the most awesome invention ever! This is the only way we were able to do the tall wall without hiring people.  Highly recommend!
Oh and side note: I went in the downstairs bathroom to check out the paper in there and it PEELED RIGHT OFF.  No spray or scoring or anything needed.  Why couldn't it have all been like that?!
It came right off!!

Before

After! Pre-paint